Thursday, 7 May 2015

Furniture Care & Cleaning Tips

Caring for Furniture

Use these tips to care for your furniture and it'll look its best for years to come.
Fine wood furniture is a treasured possession in any home, and with good care, it can last for generations. Upholstered furniture provides us with comfort, color and texture. Who doesn't love sinking into the cushioned softness of a favorite sofa?


Fine wood furniture
Care for fine furniture with these recommendations:

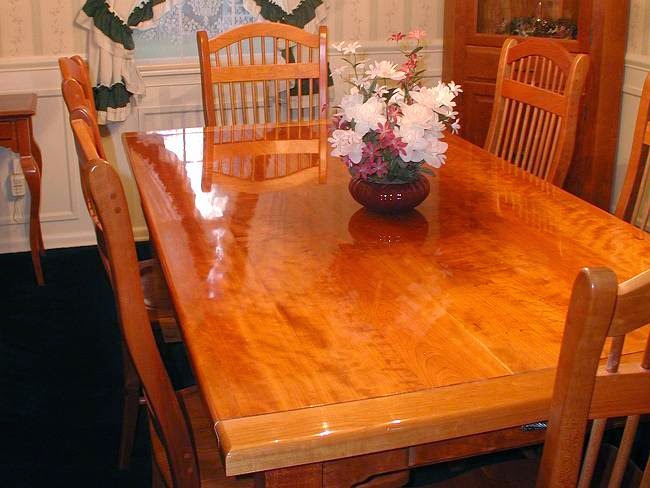
Avoid heat and light. In a natural state, wood contains a surprising amount of moisture. Preserving appropriate moisture levels is key to the preservation of fine furniture. Accordingly, position fine wood furniture away from heating vents, fireplaces or radiators. Don't store fine furniture in attics, where temperature and humidity levels vary widely from summer to winter, day and night. Avoid placing furniture in areas where it will sit in direct sunlight, which can fade fine furniture; use drapes, sheers or protective window films to guard against the sun's rays.
Protect from damage. Everyday life can be hard on wood furniture. Moisture from sweating beverage glasses leaves round rings in the finish, while the heat from a hot dish can ruin the wood finish beneath. Provide cork- or felt-bottomed coasters if you will set glasses or mugs on fine wood, and always use trivets to support hot serving dishes. Place mats, tablecloths or padded table covers protect dining room tables from spills or scrapes.
Clean safely. Dust frequently. Occasionally, wood furniture will require heavier cleaning. To remove greasy soil or the film from cigarette smoke, mix a solution of oil soap and water as instructed on the oil soap package. Using a natural sponge, moisten it with oil soap and wring out most of the water. Gently stroke the furniture to loosen soil. Rinse the residue from the wood with a sponge wrung out in clear water, and then dry the piece with fresh cleaning cloths.
Dust fine furniture often with a lamb's wool duster or barely damp white cotton cleaning cloth. Microfiber cloths do a good job of attracting and removing fine blown-in soil. Avoid using a feather duster, as a broken quill can scratch and damage delicate finishes.
Dust damp. Dusting with a dry cloth can scratch, so lightly spritz your cleaning cloth with water, a spray dusting agent or wood polish. Never spray furniture directly, as overspray can leave a difficult-to-remove film. Follow the grain of the wood as you dust to avoid cross-grain scratches.
Dust often. Frequent dusting removes dirt before it has a chance to settle in and make itself at home. Dusting often keeps an oily build-up from forming on wood furniture.
Note: Seek professional advice before cleaning if the wood is in poor condition or the item of furniture is an antique.
Polish or wax? Both wax and furniture polish are applied to fine wood furniture to protect the surface — but you'll need to pick one or the other. Don't try to combine these products or you'll create a gummy mess. Make sure that you have selected the appropriate treatment for the piece's finish. Check with the manufacturer for recommended polish or wax options.
Which to choose? Wax is a semi-solid product; it requires elbow grease to apply, but it creates a long-lasting coat. Furniture polish is easier to apply than wax; it is made using petroleum distillates (a solvent), and evaporates fairly quickly. Most people overuse polish to restore a fresh finish. Layers of polish buildup, combined with body oils and dirt, create a sticky, dull film over the surface. If you use polish, use it with restraint.
The same applies to furniture sprays. They contain silicone oil, which is inert and which does not evaporate like furniture polish. Use them sparingly, and buff the sprayed area well with a clean cloth. Buff it again to raise the shine.
Apply wax or polish to furniture that has been freshly cleaned with oil soap and allowed to dry thoroughly. Follow package directions, and have plenty of clean white cleaning cloths available.
Upholstered furniture 
Dust and dirt act like sandpaper on furniture fabric, so remove it frequently. Vacuum upholstered furniture weekly; lift cushions and use the crevice tool to remove hidden crumbs beneath. Keep upholstered furniture looking new with these tips:

Flip, swap and rearrange. Being territorial creatures, most humans gravitate to their favorite places but when it's the same seat on a long sofa day after day, that preference will start to show. Flip loose cushions regularly, and rotate them on a multi-cushion unit. Similarly, rearrange upholstered furniture once or twice a year to distribute wear more evenly. Switch the position of a love seat and a sofa, or swap the positions of a set of chairs as the seasons change.
Arm caps. Places where bare skin or hair come to rest — armrests, chair backs, seat cushions — are subjected to higher levels of soil and abrasion. Protect high-contact areas of upholstered furniture with arm caps tailored to fit snugly over chair and sofa arms. Made from the same upholstery fabric, they're all but indistinguishable as they protect fabric from wear.
Slipcovers. In areas with hot summer weather, consider washable slipcovers. Traditionally applied to furniture during the warm season, slipcovers protect against sweat, suntan oil and other summer hazards.
   Fabric protection. Spray-on fabric protectors coat fibers and protect upholstery from spills and           stains. Fabric protectors can be applied at the mill as the fabric is processed, by the furniture retailer,    or at home using commercial spray products. If you apply fabric protection yourself, read the product    instructions and observe safety procedures carefully.


Caring for leather furniture
Leather upholstery can last for many years if looked after correctly. Follow these tips to take good care of leather furnishings:


Keep away from heat and light. Leather furniture is very sensitive to heat and sun damage. Position it away from windows, and from heat sources such as fireplaces, radiators and central heating vents.
Uncoated leathers. Furniture made from uncoated leathers should be dusted frequently. An art gum eraser may remove some stains or deposits safely, but do not use leather creams, conditioners or saddle soap on uncoated leather, since these products can change the color or appearance of the leather.
Coated leathers. Check with the manufacturer for recommended cleaning methods. Vacuum regularly to remove surface soil. Commonly, leather creams or conditioners may be used to clean coated leather once or twice or year. Test leather cleaners in an inconspicuous spot before using.
Avoid unsuitable products. Never use oil, furniture polish, dusting sprays or ordinary stain removers on leather furniture.


Thursday, 23 April 2015

Everyday Tips For Decorating The Dining Table

Everyday Tips For Decorating The Dining Table


You don’t need a special occasion to decorate the dining table and to make it look beautiful. Every day should be special. Today we’ve gathered a series of lovely tips and ideas meant to show you a variety of ways in which you can make the dining table look beautiful using numerous techniques.

Decorate with fruit.


Use fresh fruit to add color to the dining table. Put apples, oranges, lemons and any other fruits you like in transparent glass containers and turn them into centerpieces for the dining table. What’s really nice about this idea is that you can eat the fruit for desert so they’re not just simple decorations.

Decorate with plants


Another lovely idea is to use fresh plants to decorate the dining table. You can have two or three potted plants placed at the center of the table. They shouldn’t be too big or they’ll occupy a lot of space on the table plus they’ll obstruct the views.


For a special event such as christmas or Thanksgiving, the table décor can match the rest of the accessories and décor features in the room. For example, you can have the centerpiece match the Christmas tree or the garlands.


In modern decors the whole idea is to be simple. You can adapt any type of dining table decoration to this style. For example, use a simple wooden planter to bring color into the room.


A vase of flowers is always a good option. The vase itself can be the focal point and the flowers can be simple and monochrome. Or you can play with shapes and colors and create an eye-catching flower arrangement.


It’s also possible to skip the flowers and to only use vases. Group them up and combine various shapes, sizes and colors to create a really interesting display. Similarly, you can use other types of collections to decorate the dining table.


You can also decorate with candles. You can pick some really lovely votives or you can make them yourself. Use pillar candles. They’ll very versatile and long-lasting.


Sometimes the table itself is interesting enough and doesn’t need anything else to look beautiful. To highlight the table, you can surround it with minimalist dining chairs and you can also display a beautiful lighting fixture above it.

Thursday, 2 April 2015

How To Buy Outdoor Furniture For The Summer

How To Buy Outdoor Furniture For The Summer

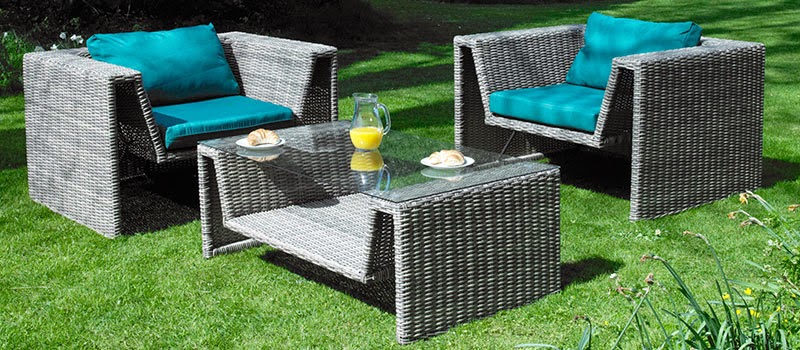
When summertime draws near, most homeowners are eager to embrace the sunny outdoors, especially spending time in their own backyards. Great outdoor furniture can bring comfort and function to an outdoor space. A home patio, deck, garden, or balcony can turn into an additional room during the warm months with carefully selected furniture materials. By using decorative accents, one can easily create a welcoming living space to relax outside of the house. Choosing the right furniture can transition these spaces into appealing summertime escapes.


Factors to Consider when Buying Outdoor Furniture for the Summer

When it comes to buying outdoor furniture for warm seasons, homeowners need to consider several factors to ensure that they spruce up their spaces the right way and at the lowest cost possible. Other than the cost of buying patio furniture, consider maintenance for the pieces, storage, color, and the quality of the furniture to enjoy all upcoming summer seasons in a special way.

Choose Low Maintenance Outdoor Furniture

Homeowners want to enjoy their outdoor space as opposed to worrying about maintaining it. By purchasing low maintenance outdoor furniture, a homeowner can reduce the time and cost spent on outdoor upkeep. To achieve this objective, choose metal, teak, cedar, and other all-weather wicker pieces, as these materials resist any challenges that weather throws their way. Furniture made from these materials is typically durable lasting for years without the need for repairs.

Consider the Available Storage Space

Even the toughest of the materials such as teak, metal, or wrought iron need proper storage to last longer. Homeowners can add durability to their patio furniture storing the pieces away from weather elements when not in use. Consider the available storage space before buying the furniture. If there is limited space, buy folding patio furniture for compact storage.

Check the Color
When it comes to buying patio furniture, homeowners have unlimited color choices, but since the summer is generally hot, purchasing materials that can help reduce the effects of the sun can be a great option. Brighter materials are a good addition to natural tones of wooden outdoor furniture. For chic finishes and to aid in prolonging the life of the furniture, carefully choose materials that reflect the light to help keep patio spaces and furniture cool while giving them a cozy look.

Quality of Outdoor Furniture

The old adage "You get what you pay for" is true when buying outdoor furniture for summer seasons. The quality of the furniture piece is an important factor since it sits outside amongst the elements. Inexpensive plastic chairs and side tables can make the patio space look great, but they become brittle and their color diminishes over time. Although outdoor furniture made from other materials such as teak wood and wrought iron cost more, they are considerably more durable, holding their shape, color, and overall look for many years.

Choose Dual Purpose Outdoor Furniture
The best way to invest in outdoor furniture is to buy hardworking pieces. Furniture pieces that double as extra seating in the backyard and a stand-alone dining table are especially important for a homeowner looking to save on the cost of furnishing their outdoor spaces during the summer.
 Choosing the Right Materials for Outdoor Furniture
The lifespan of outdoor furniture depends on the type of materials. Different materials have different longevity. Carefully select materials that not only give the space a stylish look, but also last longer.


Thursday, 19 March 2015

10 Tips About Caring For Wood Furniture

10 Tips About Caring For Wood Furniture


1.       To clean the finish on your wood furniture just use warm water and mild dish soap. Cleaning furniture with water won't hurt it -- just be careful not to soak it. Use an old toothbrush for hard-to-get areas. Wipe the dirt off the surface with soft cloths or paper towels until they come up fairly clean. Then dry off any residual moisture with a soft cloth.

2.        After a good cleaning, the best way to protect the finish is to use a good-quality soft paste wax. Apply a thin coat as directed on the label. Wait five minutes and buff lightly with a soft (shoe) brush or cloth. Wait another 30 to 60 minutes and buff/brush again with a bit more vigor. You'll see a beautiful shine return to the finish that will last for many months.

3.        Keep your furniture out of the sun. The temperature of the summer sun coming through a window can go above 140 degrees. It will cook fine finishes, fading and destroying them over time, and dry out and shrink the wood, which will cause cracks.


4.       Don't place wood furniture near heating units or vents. Dry heat will cause the wood to dry and shrink, leaving cracks. Use a humidifier in the drier months to bring the moisture up to the 40 to 45 percent level.

5.        For a quick-fix touch up, use the appropriate color shoe polish on scratches and chips, especially to make them less visible on the feet of furniture. Carefully using a matching-color felt-tip marker first will hide it even better.

6.       When polishing metal hardware, take it off the furniture first. Take your time and make a note to remember what piece goes back where. Use a quality metal polish to get it shining again. Once it's buffed, put it back on, being careful not to scratch the wood surfaces. I recommend that you don't try to do this all at one time. It can be a lot of work, so take a few days, doing a few pieces at a time, instead of getting tired and frustrated with trying to do too much.

7.       Wood isn't hungry! You cannot feed furniture. No matter what the advertising says, wood cannot be fed or nourished or enriched with polishes or oils. Once it has a protective finish over it for beauty and protection, the wood is sealed. Polishes and oils will not penetrate it.


8.       There are several ways to remove the white hazy ring or spot that the hot coffee mug or hot pizza box made on your table. The least invasive way is to rub it with a mild abrasive, such as non-gel toothpaste mixed with baking soda or cooking oil mixed with ashes. You can rub it in a small spot with your finger or use a soft cloth on larger areas.                                                                    Another method that has excellent results is to place a soft cloth or towel over the spot and iron it carefully for 10 to 20 seconds at a time with the iron at a medium setting. You can turn the iron up a bit if needed. Always keep the iron moving and check your progress frequently.

9.        When shopping for new or antique furniture, look at the back, inside and undersides of furniture and drawers. Many times it tells you more about quality than looking at the "show" side. The so-called "secondary" woods can speak volumes about the age of the item and the quality of construction.

10.   Restoring or refinishing an older or antique piece of furniture to its original glory might seem like a good idea, and many times it is. But it's important to get advice from someone who is knowledgeable about the item you are considering. You may find that your piece is valuable and just needs a proper cleaning. Any more extensive work should be left to a professional.


Tuesday, 17 February 2015

Basic Rules Of Table Manners

Basic Rules Of Table Manners

A few tips and rules for basic table manners...

  • Napkins should be placed on the lap as soon as you are seated. When you get down from the table, leave the napkin, unfolded on the table, to the left of the place setting.


  • Sit a comfortable distance away from the table, so that with the elbows bent the hands are level with the knives and forks.


  • Sit up straight, sit square with hands in the lap and do not fidget. Do not put elbows on the table.


  • If you are served a meal that is already on the plate, wait until everyone has been served before picking up your cutlery, unless invited by your host to start.


  • Make sure others have been offered anything they might want from the table, such as butter, water, salt or pepper. Help yourself last and never stretch across people.


  • Do not begin eating until everyone has been served, unless the host or hostess gives their permission for diners to start.


  • Eat at a relaxed pace and pace yourself to match your fellow diners.


  • Keep your mouth closed and try to avoid making noises of any kind while eating, either with implements against the plate or teeth, or with actual ingestion of the food, e.g. slurping soup.


  • Talking while there is food in your mouth should be avoided at all costs - even when you have a conversational gem up your sleeve.


  • When you have finished, place your knife and fork - with the tines facing upwards - together on your plate.


  •  If you are confronted with a plateful that is not to your taste, try to soldier on to avoid hurt feelings. Always compliment the cook.

Thursday, 12 February 2015

How To Decorate A Kitchen By Choosing Theme

How To Decorate A Kitchen By Choosing Theme


Method: Choosing a Theme

1 Pick a style for your entire kitchen. The main way most people go wrong with their kitchens is in not choosing a theme. They have a vision here and a vision there (or they pick up knickknacks as they find them) and conflate them together into one hodgepodge of a kitchen. Pick a theme and you've tackled 80% of the battle.

·         It's important that your kitchen decorating be cohesive and make the room look pulled together. Accomplish this by deciding on one theme for your kitchen and choosing decorations that match it. Some home improvement stores have entire sets of kitchen decorations based on themes like country living, French or art deco styles.


2  Go ultra-modern. If you love sleek, shiny things, a super modern kitchen may be your style. Think in harsh angles and blacks, whites, and popping, bright colors. Most metallic, stainless steel, and geometric art pieces would adorn this kitchen. Glass, too!


3  Do a sea theme. A common (but still classy) theme to choose is a sea theme. Whether you live on the ocean or want to bring the ocean to you, this theme is cozy and inviting.

·         Line your shelves with seashells, sailor's gear, and scenes from the beach. Work in elements of tan, cream, and blues. What a great excuse to make a DIY project with rope, netting, and items from the beach!


4  Opt for an earthy theme. If you are fond of dark, warm colors, an earthy, natural, woodsy theme may be more up your alley. Think of dark cabinets, wooden dishware, bowls of potpourri, cherry reds, rich mahoganies, and dark oranges.


5  Go for a colored theme. If an outright themed design is too much for your sensibilities, just go for a color. Hues can line up a kitchen, too! Blue stools, blue dishes, blue cabinet pulls -- everything will be brought together regardless of your items' designs. Just make sure you don't get sick of it!

This theme is a bit dangerous. Too much of one tone can be overkill. However, if you do not have the authority to revamp your kitchen (if renting), incorporating color as your theme may be the best way to go.

Wednesday, 4 February 2015

How To Decorate A Kitchen By Making Big Changes


How to Decorate a Kitchen By Making Big Changes


Method  : Making Big Changes

1 Create shelving. Since your cabinets are probably stocked to the brim, you'll probably need other methods to house what's left over (the decorative doodads and the like). For this, you have two options:

·         Floating shelves. If you have walls (and you probably do), you can install floating shelves with ease. They will also draw the eye upward, so if your kitchen is small, it will distract from the cramped-ness of the rest of the room.
·         Cubed shelving. This is turning a wall into a series of boxes. They are artisticand utilitarian. For an added touch, decorate each box (or some of the boxes) with different types of shelf paper. Tada, kitchen innovation.


2 Stick with an accent color. A kitchen does not need too much going on, so sticking to black and white and other neutral tones are your best bet. Nevertheless, take that monochrome look and spice it up with a specific accent color. Maybe bright yellow or bright blue? Suddenly, the eyes aren't concerned with the size and immediately focus on your great pieces.

·         Think of accents in your art, towels, and dishware. But remember: it's an accentcolor. Too much of an accent color makes it an accent color no more. If you overdo it, you'll lose the effect. Stick to 4 or 5 pieces.
·         Three words: Paint. The. Ceiling.


3 Consider losing all your doors. Whether it's cabinets or drawers, think about removing the doors. Sure, this means everything on the inside will need to be organized, but that can easily be overcome with cute storage containers and pretty glass and textured bins. And more opportunities to show off your decorating side!

·         The idea here is that you're opening everything up -- literally. The more open it is, the more room the eye will see. The more room the eye sees, the larger the room will seem.

4  Use mirrors. Just because you're in a kitchen doesn't mean you can't do whatever the heck you want. And since you probably know that mirrors open rooms, why not put one in your kitchen?! It doesn't have to scream "I'm a mirror!" either -- simply place it underneath your cabinetry for a is-it-there-is-it-not-there look.

·         Mirrors (with frames) also make for good trays. Slap some felt on the back and boom -- automatic DIY success.


5 Paint the walls or cabinets. A room's color helps it feel warm or relaxing, so decorate your kitchen by adding a fresh coat of paint to the walls or cabinets. White is a popular choice, but you can opt for a light shade of blue or yellow if an all-white room isn't appealing.

·         Use a variety of neutral tones. While using white, cream, and gray may seem drab, when you mix up various neutral tones, it adds depth and sophistication, while staying classic and simple. Turn boring into brilliant by just using a few shades.
·         Add a focus. Paint three walls one color, and the fourth wall a color that pops. The eye will move to it without even realizing it. If you have a great window or area of the room that's eye-catching, amp it up with a focus color.


6 Add a backsplash. If you are committed to white walls (either against your will or not), you may feel like your kitchen is a little lacking. Get around this by adding a backsplash -- that is a panel behind the sink or stove that protects the wall from splashes. And the panel can be any style you like!

·         It's easiest to stick to a solid color to add an accent, but consider tiles and patterns, too. Tiles can add extra texture to an otherwise smooth wall.
·         If you already have tile, think about buying tile stickers. A super (couldn't be easier) easy way to jazz up that backsplash in seconds.

7 Play around with lighting. You have more options here than you probably realize. Depending on your electrical system, lighting can take on several different sources. Each one can vamp up your kitchen, rejuvenating it with life.

·         Play around with table lamps. Those work on counters, too! It adds a homey, unexpected feel to any area. If you are feeling extra creative, make a "lamp" out of a string of Christmas lights in a clear, glass jar.
·         Put lights in (and under) your cabinets. Not only will your pieces be lit up (and they'll look fantastic), it can serve as dim lighting when the full guns aren't necessary. In other words, romantic and functional.
·         Get a great hanging lamp. Even if you don't have much space, a great hanging lamp with an eccentric drum shade can be so much fun you won't notice anything else. Or get several small ones for more lighting options.
·         Go for sconces. If you don't have room for a big hanging shade or lamps on your countertops, a sconce is an easy way to go. Some are incredibly easy to attach and can provide much more light than their size would allow.


8 Focus on one element at a time. Decorating a kitchen can become overwhelming if you try to change everything at once. Give yourself one decorating project, like painting or buying new dishes, and stay with that project until it's completed. You can move on to others later if you feel your kitchen needs more decorating.
·         This well help you know when to stop and when (and how) to keep going. Sometimes adding a focal point or changing your dishware can put a new twist on your kitchen that may be the small tweak that it needed. Create a priority list of things you want to add/change and slowly move down it as necessary.